Single Sign-On (SSO) Integration
Learn how to integrate Rampart SSO into your application
Rampart provides a secure Single Sign-On (SSO) system that allows you to seamlessly authenticate users and businesses in your application in a SAML-like way.
 The SSO integration process follows these 5 key steps:
First-Time Connections
Redirecting to Rampart from your application
With your SSO page configured, you can now create direct links to Rampart from anywhere in your application. The authentication flow happens automatically:
You should:
The SSO integration process follows these 5 key steps:
First-Time Connections
Redirecting to Rampart from your application
With your SSO page configured, you can now create direct links to Rampart from anywhere in your application. The authentication flow happens automatically:
You should:
Overview
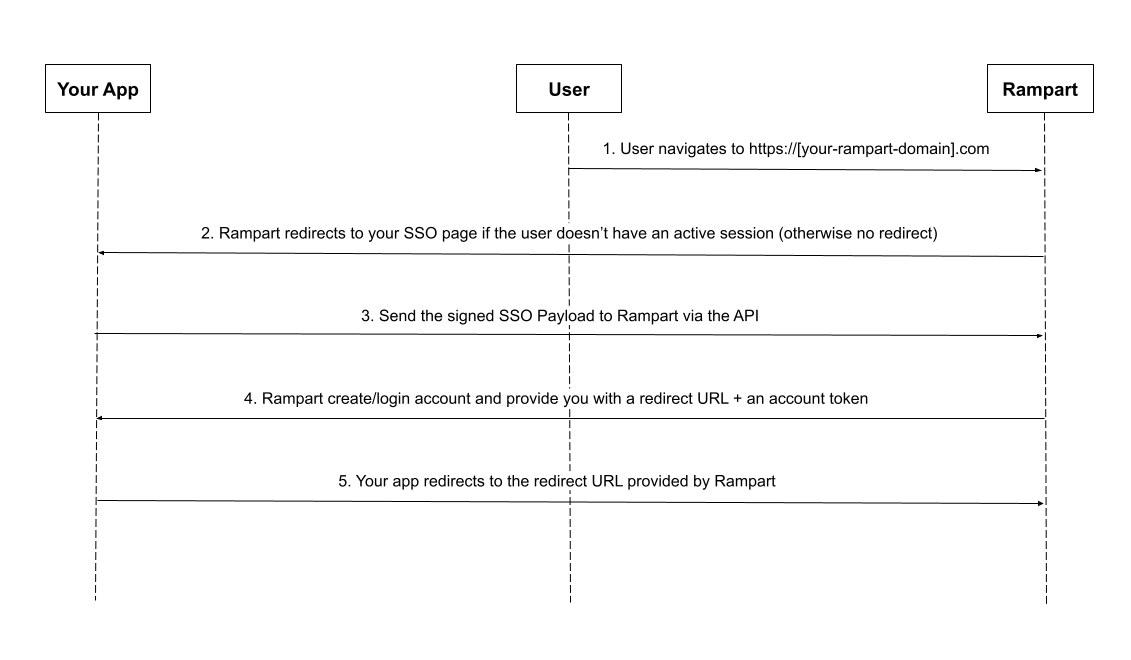
The SSO integration process follows these 5 key steps:
- User navigates to your Rampart instance or you redirect them there
- Rampart redirects the user to your application’s SSO page if they don’t have an active session
- Your app creates and sends a signed JWT token with user/business data to Rampart’s API
- Rampart creates/logs in the account and provides you with a redirect URL and account token
- Your app redirects the user to the provided URL to complete the authentication
Step-by-Step Implementation
Step 1: User Navigates to Rampart
The user can either navigate directly to your Rampart instance or you can redirect them from your application:Step 2: Handling Rampart’s Authentication Redirect
When a user visits your Rampart instance without an active session, Rampart redirects them to your SSO page.Configuring Your SSO URL
Important: You must register your SSO URL in the Rampart Command Center:- Log into your Rampart Command Center
- Navigate to the SSO URL Configuration section
- Enter the complete URL where you’ll handle SSO requests (e.g.,
https://your-app.com/rampart-sso) - Click Save
Implementation Requirements
Your SSO page must:- Receive redirects from Rampart
- Check if the user is authenticated in your system
- Generate and send the JWT token with user/business data to Rampart (details in Step 3)
Handling Common Scenarios
User is logged out of your applicationWe discuss about the Rampart’s
accountToken in Step 4.- User clicks a link to your Rampart instance
- If they don’t have an active session, Rampart redirects to your SSO page
- Your SSO page handles authentication and completes the flow
- User arrives at their intended Rampart destination
Step 3: Create and Send JWT Payload
Required Data Structure
Create JWT Token
Send to Rampart API
Step 4: Receive Redirect URL and Account Token
The Rampart API response contains:- Store the
accountTokensecurely with the user’s data for future API calls (e.g retrieving his notifications, savings analysis, etc) - Prepare to redirect the user to the provided
link
Step 5: Redirect User to Complete Authentication
Store the
accountToken with the company record in your database, not with individual users. Rampart’s API primarily operates at the company level rather than the user level.